
Assembly & Installation Instructions
Therma-Dome Pull-Down Attic Stair Cover
Click here to view an installation video
The following step-by-step instructions will guide you through the unpacking, assembly, installation, and proper use of the Therma-Dome Pull-Down Attic Stair Cover.
Before assembling your Therma-Dome Cover, read and understand all instructions completely.
Make sure there is enough headroom in the space above the attic stair opening for the completed Therma-Dome cover to fit through the opening.
If the opening is obstructed, the assembly must be done in the attic.
A flat, solid work surface is preferable.
All Therma-Dome components are lap-jointed for a precise fit, and should have a continuous ¼” bead of adhesive applied to the center of each joint as you assemble your Therma-Dome cover.
Unpacking

Use care when unpacking your unassembled Therma-Dome Cover
To minimize the risk of breakage, make sure to grab each foam component by the thick portion and not at the edge where it is thin.
Each kit will contain
- 6 foam panels
- 1 Tube of adhesive
- 1 Roll of foil tape
- 2 Nail-in achors
- Instruction sheet

Part “A”
2 end panels
Shorter panel with Velcro strap and gasketed edge

Part “B”
2 Side Panels
Longer panel with gasketed edge

Part “C”
2 Top Panels
Longer Panel with no gasketed edge
The “shiny” silver side of each panel will be oriented on the exterior (attic side) of the completed Therma-Dome cover,
while the “dull” side will be on the interior (stair side) of the cover.

Assembly

Assemble the Sides
Apply the adhesive to both short lap-jointed end pieces (Parts “A”). Assemble the ends and the sides (Parts “A” and “B”) together. Make sure all parts are tight and the edges are even. Use 3″ lengths of foil tape to secure each of the four corners while the adhesive dries.

Assemble the Top
Apply adhesive on the ledge at the top edge of the assembled sides. Place the top panel (Part “C”) with the ledge toward the center of the cover. Apply another bead of adhesive along this center ledge, where the two top panels (Parts “C”) will be joined together.

Place the second Top Panel (Part “C”) in place, pressing it into the adhesive to ensure a good bond and seal. Square up any unevenness before the adhesive sets.
Use 3″ lengths of tape to hold the components in place and square while the adhesive dries.

Seal all Seams with Foil Tape
The finished appearance of the Therma-Dome cover may be improved by applying the remaining foil tape to all exposed edges. The tape may also be used to repair or patch your Therma-Dome, should it become damaged.
This step of sealing the seams is added insurance against drafts, and helps to ensure compliance with building insulation codes that require components to be glued and taped. It does not matter whether you choose to seal the inside or the outside of the corners. If you choose to cover the attic side seams, make sure you place the foil tape in a way that it can adhere to the foil face of the insulation board. It will not have a sufficient bond to exposed foam.
Placement


Preparation
No Floor Deck
For the best results, the Therma-Dome cover’s gasket must be resting on a flat, solid surface. If your attic does not have a solid floor, install a level deck (plywood, OSB, or equivalent) around the rough opening of the attic staircase that will be wide enough to allow the gasket to attain a good seal. Seal all wood joints with caulk, weatherization tape, or spray foam to prevent air leakage.
Attic Access Opening is too large
In the unlikely event that your attic access opening is too large for the gasket on the cover to get a good seal against the attic floor, install a furring strip around the inside of some or all of the edges of the attic opening.

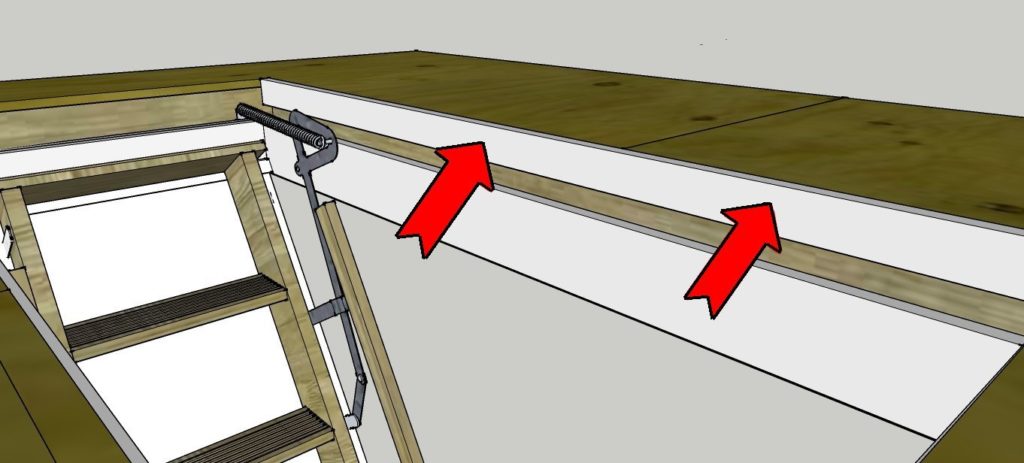
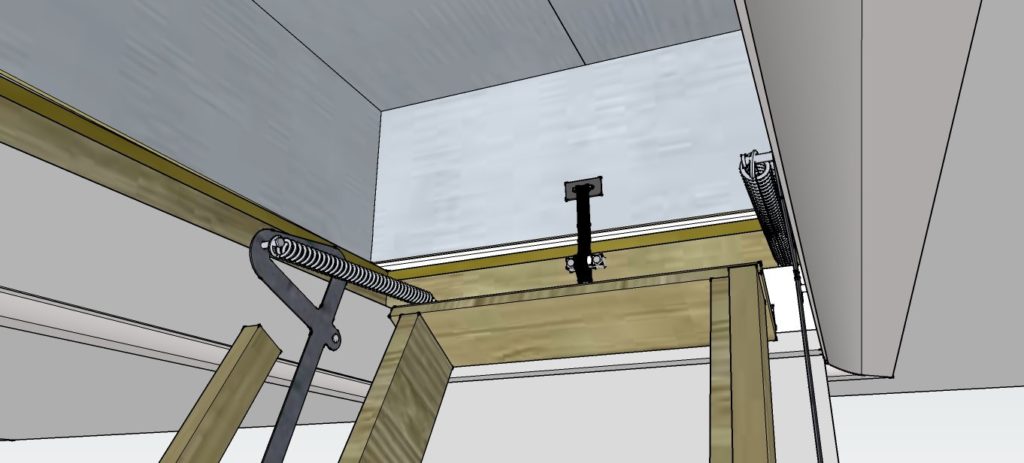
Install Provided Strap Anchors
Nail in each strap anchor so it is centered on on the framing at each end of the attic opening.
Secure cover in place with straps
As you descend the attic stairs, place cover over the attic stair opening. Secure Velcro straps to the strap anchors to maintain compression on the gasket and ensure that the cover remains in place.
Stairs operation will not be hindered, as collapsed stairs will fold up into the cover.
To additionally ensure an air-tight seal between the living space and the attic, consider applying weatherstrip gasket to the perimeter of the ladder door where it meets the trim. The “dead air” pocket this is formed between the door and the Therma-Dome cover will work as a system to increase R-value over the stairs.